Welcome to my blog!

The purpose of this blog is to explore my development of scrapbooking techniques. I will also provide reviews of products when I find something great or something terrible, and will show off all the work I enter in challenges and contests. Please check out my Welcome note if this is your first visit.

Feel free to ask questions about any of the materials or techniques shown here!

Please leave a comment and let me know what you think, or follow my blog so you can keep updated!

Happy Scrapping!


Showing posts with label stash buster. Show all posts

Tuesday, March 20, 2012

Frosted Designs, Challenge Me Happy & 2SF sketch Challenge Combo

So I was over at Two Scrapbook Friends on the weekend for a crop, and DT member Jayne was working away on the LO she is using for her sketch challenge to be posted today. She mentioned that in passing, so I borrowed her LO, sketched it up, and went to work (I really love that LO!)

 
I will update this post with the sketch when I get it tomorrow off the forum.

 
In addition, I am also using this LO for two more challenges:
  • Frosted Designs - use wings - the wings chipboard is from Bo Bunny Cambridge (2010)
  • Challenge Me Happy - Make your own embellishments - I made two folded paper flowers that Jayne also had on hers, as I loved them and wanted to try them out!

 
This is the final project:


If there was a challenge for using as many manu's as possible, I would get it too! I used DCWV Photo Stack 2 for the background, Creative Memories Reminisce for the light orange flower and the scalloped strip thing, Cosmo Cricket EverAfter for the three circles other than the dark one. The dark one is Colorbok, the chipboard and two round brads are Bo Bunny Cambridge, the charm is My Mind's Eye, and the buttons and jute I will call 2SF brand since I got them loose in the store! Phew! Longest supply list ever!
 
Oh... and I used my Staedtler pens to write the title on the wings... those are the pens I always use and never remember to tell you all!


Both flowers are made the same way. Cut 5 circles, and fold 3 of them into quarters. Glue onto the 5th circle. For the bottom flower, I then folded the top layer of each folded circle back into an eighth size to give the added flair. I think you can go further by changing how you fold the 1/8 portion and placing them next to each other or alternating like I did. You do need a glue gun to get the button to stick though!

Thursday, March 15, 2012

2SF Challenge - use a Mosaic

One of the challenges last month over at the Two Scrapbook Friends forum was to use a mosaic on a project. I used all scraps for my mosaic, all from the Cosmo Cricket EverAfter collection. Since I didn't have enough scraps to do a whole 12" strip, I added a note card from the same collection... Then I added some ribbon to define it more on the left. The chipboard "I love you" and both ribbons are from the same collection. The doves are Jolee's.


Saturday, December 17, 2011

HMITM #186 - Be a Star

OK... this week at HMITM they have really gone crazy lol. The consulted a calendar of strange "holidays", and compiled this list...

December is Bingo's Birthday Month.
It's also Rising Star Month.
And it's National Tie Month.
The first week of December is Cookie Cutter Week.
December 5 is Bathtub Party Day!
 
And then came up with this challenge:
So...I challenge you to use:
* A bingo card (if you don't have these in your stash, just google "bingo card" under Google Images, and you'll find a gazillion).
* Use something that you can tie--ribbons, twine, raffia, etc.
* Use at least 5 stars.
* Use punches or cutters or a shape templates.
* Use your imagination and whatever product you want to create "bubbles" on your page.
 

Crazy I tell you. 

I was stumped... I had no bingo cards, I don't use stars ever... The other 3 criteria were good though. 

So this is what I came up with: 

The photo here is not bad - the photos in the layout are bad but that's all I had to go with from our Weekend to End Women's Cancer 32 km walk.

Back to the criteria...

  • BINGO card - yes. Found a cute Maya Road rub-on set, and used the "Live" card on white cardstock to make it stand out. I really like this set as there are a bunch of little ones - this is the largest (Cuz I'm not so sure I'm into bingo cards)
  • Something you can tie - twine, tied around the rectangle photo (I had to tie it... they said you had to be able to so I did lol)
  • At least 5 stars - I used a star template I have to draw 5 stars beside each other for the border at the top of the rectangle photo. Then I added foam glittery stars to the middle of three of those stars (so that's 8 stars). Then I put the word "star" in stars for a grand total of 12, 13 if you count the word "star" as a star
  • Punches, cutters or shape templates - I used my Creative Memories ovals set to cut the angled photo and its mat
  • Bubbles - originally I planned to stamp using bubble wrap, but the wrap I had didn't have a side of exposed bubbles, so that didn't work. So instead I used my dabber and pink and white chalk ink to dot "bubbles" all over the left of the page... it really helped to add the details
Well... I hope you enjoyed... and join in next week for more craziness!!!


Monday, November 28, 2011

Scraptastic Club 3rd November Challenge

The 3rd challenge at Scraptastic Club this month was a recipe challenge... arguably one of my favourite kinds of challenges because they can be so difficult or so easy!

From the blog:

This month's recipe is... use any three of the following:
  • Use a fall photo
  • Dig out those embossing folders. Try using them on a chipboard piece!
  • Use two colors of cardstock
  • Use rub-ons. I think that sometimes can be one of those items we tend to forget to use.
  • Punch a border
  • Use teal, orange and brown
  • Mist somewhere on your page, be it the whole page or a mask or an item adhered to your page.

Right away I knew the teal was out! I have been using lots of teal for challenges lately and I am kind of fed up of it! Also I couldn't mist or emboss, as I don't have mists or embossing folders (sigh)

So that left me:
  • Use a fall photo
  • Dig out those embossing folders. Try using them on a chipboard piece!
  • Use two colors of cardstock
  • Use rub-ons. I think that sometimes can be one of those items we tend to forget to use.
  • Punch a border
  • Use teal, orange and brown
  • Mist somewhere on your page, be it the whole page or a mask or an item adhered to your page.
I decided to skip on the fall photo, and this is what I came up with:


Two colors of cardstock - cream for the background (inked with Wild Honey... loving that color) and brown textured for matting (this is the same cardstock used here, which will be the double to this page)


Rub-ons - two of them - the blue sentiment and the matching birdies, both from a set I just picked up

Punch a border - I kind of cheated here. I used the Creative Memories border punch to make the orange strip which is the "Frame Chain" punch. So its more of a chain but since it uses a border punch system... I think it counts. Paper is CosmoCricket Everafter. The matching hearts were also punched using Creative Memories punches and inked on the edges with more Wild Honey.


These are probably my favourite portraits done by the photographer at the wedding. She is on an outdoor staircase and hence got the angle from above. Love it!

Thanks for looking!!

Thursday, November 17, 2011

Use it Tuesday #19 - Cooking Up Fun

So I found a new challenge blog this week that I love so much I applied to their Design Team!

Use it Tuesday is a blog with varied challenge types, and the whole goal is to use up your old stuff in your stash... so right up my alley as I am still banned from Michael's until after Christmas (did get a hall pass to go buy some more adhesive as I ran out last night).

So finding it yesterday and the challenge is due tomorrow, I was in a bit of a rush.

Here is Challenge #19:
COOKING!

One of my favourite topics, and a refreshing break from the two color palette challenges I did last night too! Plus, Two Scrapbook Friends is having a Burst of Color online crop right now, so I've got color challenges coming out the.... hoo hah? I have no idea how to spell that word!

Anyways... back to the challenge:

I decided since I had to use old stuff I would actually finish a layout I prepped about 2 years ago and that has been sitting in my album waiting for me to put it together. All I had made was the base for the door and the papers amassed. This is what it came out to be:


My friend Laura made my wedding cake for me. It was sooo yummy - we used a Martha Stewart lemon recipe, and was slightly oversized (I have 2 pieces still in my freezer), but it was gorgeous.


I made a little door to hide the final product. Originally this door was supposed to open vertically back 2 years ago, but I changed which photos I wanted to use and changed the door. 

Here is a closeup of the title on the door and the stamping.

Here is the closure on the door, the twine actually hooks to hold it shut.


So what did I use out of my stash:
  1. old unused papers that were sitting in my album for 2 years (who knows when I bought them to begin with, I think another 1-2 years earlier)
  2. photos I printed 2 years ago
  3. a paper and cardstock door I made two years ago
  4. All three stamps (bell, cake and arrows) which I bought before the wedding (June 2009) and have not used those specific stamps off the cards yet
  5. The letters for CAKE - this is some old pack of stickers I don't know when I bought it, but it was a long time ago because there is lots missing out of the pack and I'm at the point where I wish I had bought two  (TIP: always buy two packs of alphas. You'll need them. Guaranteed)
What was new:
  1. The twine! I just got my twine in last month and I am using it up quick!
  2. The "Making the" letters - also bought them last month although I bought them from my Creative Memories Consultant's stash of stuff.... so sort of old
And the brad I used I will classify as neither old nor new. I've had them for about a year so I don't think they fall in either class.

Back to always buy two sets of alphas... look at the "e" in "the". Can you tell its a "c" I made into an "e" with a marker? That's why you need two sets. Because sometimes you need extra letters. And to be honest, its not always the obvious ones. I.e. L. My friend Kelly used both my Ls. So the layout I did that day using the same chipboard letters was missing an L til I picked up another pack. Haven't used an L since and I have done at least 3-4 more layouts with those alphas lol

Another TIP - when you buy alphas, look at if you get extra vowels, "s", "t", "r". At the very very least you want an extra of each of those letters otherwise you're stuck with a page of W and X at the end. (at least you can make a W into a M)

And a final TIP - look for punctuation and other add-ons to your alpha set. Jillibean Soup has great alphas that include some shapes, punctuation etc. I also really love my Nancy O'Dell Hummingbird letters from Creative Memories as they came with little doodled flowers to match those on some of the capital letters.... I just wish they came with more as I have capitals left over and no more flowers :(


Well... that was a bit of a long one! Thanks for reading and please comment and follow.

Also, I have now labelled all my posts so you can find similar ones. Use the TIPS label to find all my tips to you my wonderful readers!

Thanks


CR84FN2 - Nails

I am really loving doing color challenges. They make me think so hard about where it would work, and most of the time my original thought doesn't work out.

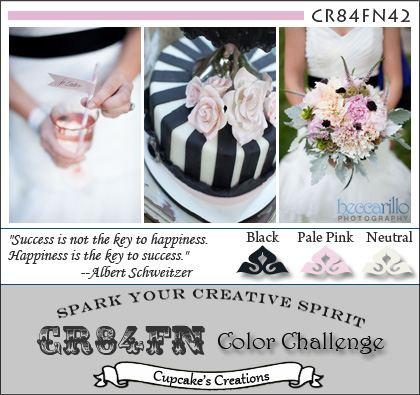
This week CR84FN brought us challenge 2 (actually the 3rd, it was numbered 0), which is shown below. You have to use the named colors as your main colors (aka you can add any other color in small amounts) and of course neutrals don't count (although for this one you have been given two neutrals).


This palette screams girly girl, babies, a trendy wedding scheme. Since my wedding was orange and green - there was no way pink was making it to another wedding page... at least not as the top color.

So I was thinking - why not our spa day? The actual photos from the day are terrible as they were taken on my old cell phone, but I wanted to document the day nonetheless.

Somehow there are no photos of my two bridesmaids? I wrote their names on the page to acknowledge they were there.

So here is my pale pink, neutral (cream) and black layout:


Under the title I added a tiny bit of journalling. I also made this cute stacked flower using two Cricut cut flowers, a Recollections punched flower, and a clear bling to draw in the clear bling on the black flowers (Jolee's). The border around the striped circle is also from my Recollections punch - I went a bit punch crazy for another LO and used all those and still have a stack of them on my desk!

Thanks for looking and please comment and follow my blog! Hope to see you back here soon!

Monday, November 14, 2011

HMITM #184 - Mix it Up

This week the challenge at HMITM was not as difficult as the two previous (thank goodness!).

So here's the challenge:
- Eight different patterns, none to match the holiday
- The word 'happy'
- Any holiday picture and embellishments. ( Embellishments can match the holiday)

Now from first glance this seems kind of hard. But I don't really use holiday papers that often (even though I own a ton) so I wasn't too worried.

Once I had this done... I had a revelation:

Everyone (yes, even you) should be doing the HMITM challenges every two weeks!

Why?
Because they are the ultimate stash busters! If you're anything like me you have your stash everywhere... ribbons over here, papers over there... and generally you have too much of one theme (for me it's Hawaii) then you could ever use for the album you originally bought it for.

Plus - my scrap bin is positively overflowing! I use scraps all the time, and try to use up every little bit of my papers so my scrap bin has itty bitty bits, big bits, and even 12x12 pages with only a bit out of them. This challenge was the challenge to empty that bin (well... not empty. but I did use 7 patterned papers out of it).

So here's my LO:

I really don't have many holiday photos. I am really good at celebrating holidays, but I never do with a camera in hand. So all I had was a few photos of random holidays, and these that I took of the kittens on Halloween this year.

I really do suggest kittens, puppies or babies if you're not a photographer. Magically you metamorph into this camera wielding crazy intent on catching all the cute and new things they do. (Last night they caught their first mouse.... forgot to hand hubby the camera for that one :( )

How did I do on the criteria?
Happy - yep! Its in the title
Holiday - yep! Halloween pumpkin carving with the kittens
8 patterned papers - check! Seven in the circle border, one for the strip across the bottom, and a re-use of one of the papers to mat a photo (I used a new 12x12 for that one).
I decided that the challenge said nothing about not using traditional holiday colors.

Top down on the circles:
  • Rainbow stripe is from some random old 8x8 pack. I have bits of this paper all over my scrapbooks, as it seems it breeds in my scrap bin - I never run out!
  • Gren dotty - I think its from the same pack as the stripes.
  • Blue circles - DCWV The Glitter Stack (old!) 8x8 stack
  • Yellow with dots - my old favourite, Creative Memories school - this was piece of a journalling card I had cut up a while ago
  • Green flowered print - also DCWV The Glitter Stack
  • Blue flower dots - no idea. Potentially the same pack as the rainbow stripe and the green dots
  • White multicolor dots - my cat pack I have (possibly DCWV or Deja Views). The only non-scrap I used
The stripe is another random paper I picked up at some point and am slowly whittling away the scraps.

The tag is from my Cat pack (it's called Cat's Life or something like that).

Most of the buttons were from a 1 lb button bag I got from Michaels, and the two glittery ones are Recollections.

And here are some detail shots:
Journalling


Stitched Circle Border - not sure where I scraplifted this from... but all I did was cut out 7 circles with my Creative Memories cutters and then used one glue dot in the middle to hold them steady, and stitched down the centre with my machine. I then bent up the edges to give it a bit more texture.


Cat Border - I marked my paper at 1 cm intervals and then drew a centre line on my punch (this doesn't have to be accurate, its just for lining up). I then punched with the lines lined up (not forgetting the 0 cm mark on the edge of the page). If anyone is interested, I can post a tutorial. The punch is a $1.50 cheapie from the bins at Michael's. I really love the extra detail this adds... and I did it all with a cheap punch rather than an expensive border punch!
Not sure how I came up with this - it just came to me. Planning on going home and doing something similar with my tiny heart and flower punches too :)

Hope you all enjoy, and as always, please comment and follow my blog!

Thanks

Sunday, November 6, 2011

Moxie Fab World Tuesday Trigger: Beads & Baubles

Well, let me tell you, when I saw the Tuesday Trigger over at Moxie Fab World this week, I was instantly inspired... it was just so... Krissy.
Krissy is my younger sister and I chose to use this inspiration photo to make a layout of photos of her from my wedding...


I feel like this layout has all the same descriptor words I would use for my sister: a la mode, fashionable, trendy, fun, funky, bright, happy, unique... etc.  I really wanted to take both the mixed-media feel and the colors from the jewelry trigger to incorporate in the layout. I chose the green/teal and white background to mimic the photo, and tried to add as much gold, pearl, bling as possible to really get the feel of the bracelet, and I think I did it!

Now for more on the details:
Paper is Cosmo Cricket. Everything else is random-ness pulled out of the stash. I used paper flowers, ribbon flowers, buttons, charms, clear stickers, Jolee's glitter stickers, bling, glass pearls, and other random stickers to keep the mixed media feel going. The metal chain is real chain I picked up in the jewelry department at Wal-Mart.


The paper roses were made from a tutorial over at Scrap A Little. You have  to check out this website, she has 20 tutorials on handmade flowers!  I brushed them with some Star Dust Stickles after the glue dried to add to the sparkles on the page.


The large ribbon rose is made using a Gluber from Cosmo Cricket.... I totally suggest you check them out and google for some tutorials on all the fabulous flowers you can make with ribbon and trims found at your local fabric store. The other small ribbon roses I received in a 1 lb bag of buttons, which is where all the gold and pearl buttons came from too!

This page ended up really thick, so I will have to use foam strips to space out the binding on my book to keep other pages from getting crushed. If you can't find a tutorial on this, there is one over in the forum at Two Scrapbook Friends.

Finally, the title and all the little clear stickers are Creative Memories Nancy O'Dell Hummingbird collection. I really love this collection as it is so elegant and fun to use. I didn't like how huge the Y was, and didn't want to use a basic serif y that was avalable, so I tucked the bottom of the y down under the page. I decided only to use her name as the title and to forgo journalling as the page was already so busy.

So I hope you enjoyed and have a good feeling for my sister and her personality now :)

HMITM Challenge #183 - Gifts

UPDATE: Thanks so much to the HMITM team for picking me as the winner this week! Good work to my fellow scrappers who also participated, I think we did a great job at using up our stashes  :)


The challenge over at HMITM this week was fab and fun! You had to include your best/greatest gifts, and also the following list of details:
Frame your page with an edge of background paper, a doodled/stitched border or a frame!
Use at least one stamp/digital brush/rub-on
3 ribbons/strings
6 circles
8 brads or buttons
10 flowers
2 elements that bleed off the page
4 crocheted or felt accents

I really love these challenges because they force you to use a lot of your stash you have lying around!

Originally I had a different plan for this LO, but when I couldn't find the photo I wanted, I looked around... and saw Casper sleeping in with all my scrapbooking stuff - his head on a stack of albums and his body on a pile of markers (crazy cat!)

And I realized, they are really a blessing in my life. They make me so incredibly happy when I come home and they missed me, and I love their little faces and attitudes they are developing. I had to put down my cat of 18 years (I had him since I was 3!) which was a very traumatic experience for me, so I shied away from having a cat. Having these kittens though is perfect. They are so much fun and keep me so happy... I think its true what they say that people with pets live longer... I certainly feel less stressed and happier with them as part of our family :)

So here they are... Casper (the friendly ghost) is the black kitten and Precious is the torti.


So back to the requirements:
Frame your page with an edge of background paper, a doodled/stitched border or a frame! - I doodled using Creative Memories templates for the top and bottom of the page with some pink Studio G glitter glue, and then did the sides free hand to "frame" the page.
Use at least one stamp/digital brush/rub-on - I used the kitten footprint stamp everywhere to add a feeling that they had been there when I made it (Casper was, but he was sleeping). I also stamped originally only on the N of Kitten, and then loved how it looked so went back in and stamped a bunch more times on the letters to make them all look walked on. I love this stamp - its of 4 feet and then has 3 other stamps on the other sides (its a cube stamp) including the little fishbone to the left of the title.
3 ribbons/strings - I used my brand new twine I just received in the mail - one to wrap the photo, one for the bow on the CM journalling card (Cheerful pack), and one to underline the title. I see twine quickly becoming my favourite!
6 circles - I may have cheated here - I am counting the 6 "bling" rhinestones in the frame as my circles.
8 brads or buttons -  There are actually 10 total brads in the LO of 3 different kinds - metallics, rhinestones, and the fabric wrapped one on the large flower.
10 flowers - 10 flowers made of various layers of almost all the paper flowers I have
2 elements that bleed off the page - The little kitten footprint stamp bleeds off the page in a few locations... see below for two examples
 

4 crocheted or felt accents - Four of the flowers have brown felt centres


Overall I loved this challenge and I love this final layout even though its kind of cute and juvenile, I think it fits as the kittens are silly babies!

Thanks for looking!

Tuesday, November 1, 2011

Moxie Fab World Tuesday Trigger "Autumn Woods"

When I saw this Trigger inspiration photo over at Moxie Fab World, I was immediately inspired.

First, the colors took me back to my beautiful wedding bouquet with its variations on oranges and greens, with a touch of yellow, red and brown. I also loved the squares and the dimensional aspect of it all, and was determined to combine this into a fantastic layout... and here it is!


This was a great challenge because all the paper I used came out of my scrap bin! I am a hoarder when it comes to scraps, I know there are some pieces I will never be able to use but I can't throw them away, so into a big basket they go! Luckily I had lots of coordinating reds, oranges, yellows and a bit of green and brown left over from other projects.

I used my Creative Memories square punch to punch all the squares. I then inked the edges with Distress Ink - Walnut stain. I used 1/8" adhesive foam squares to "pop" out some of the squares, adding to the dimensional feel of the layout.

I finished off with a few photos, including one I fussy-cut.


I had a lot of fun with this one, and still have to add the title. It will be made of letter charms strung on a piece of twine (somewhere in the mail on the way to my house right now) and wrapped around the photo of me with the flowers. 

Sunday, October 23, 2011

How Much is too Much challenge #182

The Oct 10 - 23 How Much is Too Much? challenge was to use a list of items on one LO.
  • Leaves in some form
  • Distressed edges
  • Something orange
  • 10 jewels, pearls or brads
  • 10 ribbons
I was really excited about this challenge because I love ribbon and generally only use a small amount on my layouts. Also, with the requirement for something orange, it fit perfectly into my wedding theme colors, so rather than doing a fall layout as this was intended, I went with a layout for the wedding.


The only thing I was originally stuck on was how to incorporate the leaves. I flipped through all my paper stacks until I got to the DCWV Photo Stack 2. Inside I found this lovely green ivy wall sheet, and decided to use it for my background.

I distressed the edges on the ivy leaf photo stack, and inked those edges plus the base cardstock with Tim Holtz Walnut stain to tone down the color.

My something orange is all over this page - orange ribbons and orange flowers...

I used 10 brads total - two to anchor the photo of me & dad, two on the vertical ribbon, 3 at the end of the arrow and  3 more as the dots on the RHS.

I used 10 ribbons in a variety of places on this LO, including on the top and bottom of the photo in front of the house.

This was another fun one that I found challenging, just because of the requirement for so much stuff. I sat down and planned this layout out first as I would be attending a crop, which is where the difficulty came, however it made me think more about how to use everything strategically. :)