Want to win 5 digis?? Or maybe you want that guest designer spot??
Then head over to QKR Stampede and enter a card in our Anything Goes challenge!
Here is my little card I entered, using the Gone Fishing turtle (so cute!!) and some Momenta papers from the Great Outdoors collection!
Its a ton of fun! Can't wait to see you over there!!
Welcome to my blog!
The purpose of this blog is to explore my development of scrapbooking techniques. I will also provide reviews of products when I find something great or something terrible, and will show off all the work I enter in challenges and contests. Please check out my Welcome note if this is your first visit.
Feel free to ask questions about any of the materials or techniques shown here!
Please leave a comment and let me know what you think, or follow my blog so you can keep updated!
Happy Scrapping!
Showing posts with label momenta. Show all posts
Friday, August 31, 2012
Friday, July 20, 2012
New DT and QKR Blog Hop!
Hi everyone, and thanks for popping by!
Just wanted to share with you that I have been accepted to the QKR Stamps DT! So excited to play with their goodies!
This week come hop with the new DT, and check out all our projects!
If you just jumped into the hop here, go back to the QKR blog and start at the beginning! If you came here from Tina then you are on the right track!!
Here is my project - a get well card destined for a boy :) Boys can be so tough to design for, but this was really easy peasy!
I used the Sick Bear digi for this one, and colored him up with my Copics. A bit of rick rack and some fabulous Momenta paper from my new fave PA-2328 and away you go!
Now head on over and visit Tracy!
Thanks for stopping by!
Friday, June 29, 2012
I love Momenta!
So, I got this cute new stack from Momenta this month, called Family Outings. It is just the cutest. The "themey" papers are all about things you do with your family, like camping, theme parks, etc. But the best thing about this stack is the matching papers to go with it, and the cardstock as well! You get both colored cardstock and generic patterned papers, plus the themed papers you know and love Momenta for, all in one super pack.
The pack is PA-2328, and I used it to create this LO!
All the papers are from the same Momenta pack, and then I added some stitching using my Sew Easy, some buttons, some glitter flowers, Thickers, and this gorgeous big butterfly!
The butterfly is also Momenta from ST-4994 Traditional Butterflies, these come in a pack of 7 or 8 and are stacked layers of plastic to give them good dimension paired with a light feel. I am not sure why I ordered these, I never use butterflies. But since getting them, I have already used two, and I want to order another package or two because I love them THAT MUCH! This is a MUST HAVE product in my mind because of the sheer beauty. The butterflies are all realistic and sooo gorgeous! You can see another one here on the Momenta blog.
Saturday, May 5, 2012
NSD Project for Let's Scrap, Frosted Designs and 2SF
I combined three challenges on this one... Let's Scrap style challenge, Christa's NSD challenge at Two Scrapbook Friends and the Frosted Designs Facebook Challenge.
The challenges:
Style: Whimsical
The challenges:
Style: Whimsical
WHIMSICAL STYLE
Humorous, whimsical embellishments (kites, banners, pinwheels, trees, flowers, clouds)
Bright, bold, playful papers (often with a scene on them)
Playful patterns (polka dots, stripes, chevrons, checks)
Scenes often created on layouts
Photographs often worked into other elements on page
Tongue-in-cheek humor, whimsical feel
Fun fonts used in journaling & titles
Use of fanciful, often 3-D products
Christa's challenge: use mediums
Frosted Designs: use ink and mists
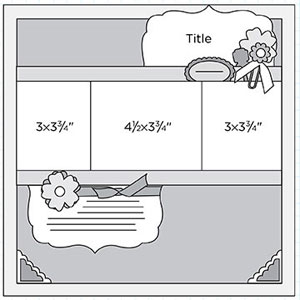
I used this sketch 8-3-11:
And here is what I made:
All the stickers and patterned papers, plus the white cardstock are Momenta's Endless summer collection.
My whimsical elements - sea embellies, bright papers with scenes, scene created on the layout, photo working into the page (as the journalling) and fun fonts.
Here is a closeup of the gesso, which was striped and then misted with Tattered Angels. The same mist was also used on the white cardstock.
Thursday, May 3, 2012
Momenta & CYAO12
Paper Secrets sure is keeping me busy!! I love working with Momenta whenever I do a Paper Secrets card because there are so many matching patterns!
This is week 12 of CYAO...

Use 3 of the following products/techniques:
heat embossing on cardstock
a punch
jewels
something vintage (it can look vintage, be a vintage looking stamped image or even be something that you print that looks vintage)
a flourish (can be printed, stamped but something that looks like a flourish and if you don't know what a flouris is there its the embellishment on the sketch)
And here is what I made using heat embossing, jewels and a punch. The butterfly also looks kind of vintage, so that counts too I think!
My supplies:
Momenta Chloe's Garden Pyramid Pack PA-2384
Cosmo Cricket sentiment
Misc stamp
Misc bling
Wednesday, May 2, 2012
Momenta & SYAO13
I'm still working on the Scrap Your Ass Off Challenge at Paper Secrets. Its a last-woman standing competition, and I am still hanging in on week 13. Yet to figure out how I am going to stay in it while on vacation, but I'll figure it out :)
This weeks challenge:

PRODUCTS (pick 4)
fabric or felt
ribbon
photo corners/anchors
3+ flowers
chip-board
3+ patterned papers
transparency
metal embellishment/hardware
TECHNIQUES (pick 1)
punches (border/corner)
acrylic paint (stamped-brushed-stencil...your choice of application)
distressing
embossing (dry or heat)
I liked this sketch right away.... it uses more than one photo! I gotta be honest, I may die in this SYAO challenge not because I can't get the page done, but because most of them are one-photo sketches and I have about exhausted all my single photo page layouts I have for all the albums I'm working on... guess I'm going to have to start getting creative :)
What I came up with this week:
Precocious Paper flowers and ribbon
This weeks challenge:

PRODUCTS (pick 4)
fabric or felt
ribbon
photo corners/anchors
3+ flowers
chip-board
3+ patterned papers
transparency
metal embellishment/hardware
TECHNIQUES (pick 1)
punches (border/corner)
acrylic paint (stamped-brushed-stencil...your choice of application)
distressing
embossing (dry or heat)
I liked this sketch right away.... it uses more than one photo! I gotta be honest, I may die in this SYAO challenge not because I can't get the page done, but because most of them are one-photo sketches and I have about exhausted all my single photo page layouts I have for all the albums I'm working on... guess I'm going to have to start getting creative :)
What I came up with this week:
See how I snuck in that extra photo as the title? I love taking photos of the signs of places we visit. I always try to take a photo of the sign first It serves many functions:
- Make sure you actually remember where those photos were taken
- Breaks up the photos in your files easily and simply
- Gives you the right spelling
- Gives you the option of using a sign for a title! I do this quite a lot, but not always.
I also try to take photos of wordy signs when I want to remember all about something, and then I can use those as journalling. Likewise, keeping all the pamphlets is helpful in case you want to add something special to your page! I have something top secret planned for all my Hawaii pamphlets that I hope to reveal soon!!
How did I do on the challenge? Well, I used: fabric for the two flowers, ribbon, 3 flowers, a transparency (on the middle photo), 3 patterned papers and chipboard buttons. My technique was heat embossing, which I did using a Momenta stencil GS-165 to make the hibiscus flower. I also used Festive Berries and Wild Honey distress ink, and clear embossing powder.
Other supplies:
Momenta Endless Summer Paper Pack PA-1108
Momenta Vacation Pyramid Pack PA-2389
Creative Memories transparent sticker and journalling cardPrecocious Paper flowers and ribbon
Sunday, April 29, 2012
Two Scrapbook Friends National Scrapbook Day Online Crop - Jayne's challenge
Two Scrapbook Friends is hosting an online crop for National Scrapbook Day which started last Friday. Jayne's challenge was to use REAL stitching (none of that sew stamper stuff), either machine or hand, on a layout.
I decided to couple it with a sketch from Scrapping Everyday Miracles, where you also had to use distressing or sanding.
I also decided to add the Scraptastic challenge number 3, to use your stash and stitch.
This is what I made:
I decided to couple it with a sketch from Scrapping Everyday Miracles, where you also had to use distressing or sanding.
I also decided to add the Scraptastic challenge number 3, to use your stash and stitch.
This is what I made:
Are you amazed I followed the sketch so closely? I sure am!!
I definitely stitched, using some old embroidery floss from making friendship bracelets. I also have the metal letters below from my stash... it took me a while to figure out a title I could make with the letters I have left (can't believe I had two s left!). Finally the green and yellow cardstock are stash items. I know, you're asking... where is the yellow cardstock? Well, its the scalloped border and I covered it with Walnut stain distress ink, Tattered Angels leather glimmermist and some green glimmer glam. I also distressed the green cardstock, the photos and the journalling card (Bo Bunny).
Isn't it all cute? In case you're wondering, the background paper is Momenta PA-1108 Endless summer paper pack.
Thursday, April 19, 2012
SYAO 10 and SYAO 11 - two very different examples of my talent lol
I'm still in it to win it over at Paper Secrets, and here is what I created for weeks 10 and 11.
SYAO10

doily
twine
stick pin(s)
3+ flowers
chip-board
washi tape
3+ patterned papers
bling
TECHNIQUES
punches (border/corner)
acyrlic paint (stamped-brushed-stencil...your choice of application)
distressing
I've actually already used this sketch once, which threw me off a bit... But I recovered at the last minute and got back in the game. I knew I didn't want both pages to look like they were from the same sketch, so I planned to make some modifications, maybe turn it, and then this happened (lol!)
So how did I do on the challenge? I used twine, stick pins, chipboard, and bling, and used acrytic paint as my technique.
SYAO11

PRODUCTS
2 or more tags
twine
stick pin(s)
3+ flowers
chip-board
washi tape
3+ patterned papers
metal/foil type embellie(s)
TECHNIQUES
punches (border/corner)
acyrlic paint (stamped-brushed-stencil...your choice of application)
distressing
embossing (dry or heat)
What a crazy sketch! I mean, really... what was I gonna do with that! Surprisingly it turned out FABULOUS...
Aren't you surprised? I know, the sketch is barely recognizable (which is sort of how I wanted it) and I cheated all over the place (of course).. and as I'm typing this I just realized that waves sticker at the bottom right of the photo moved itself and is upsidedown!! How did that happen?? Grr... Stupid non-sticky stickers. Anyways it should be right side up and nice and linearly placed like the sun sticker on the opposite corner!
My supplies? Well... this is a Momenta layout for sure: the solids in green and orange that were embossed are from PA-1033 the vibrant cardstock pack. The two blue strips plus the yellowy orangey background page are from the Travel pyramid pack PA-2389, and finally the circly paper is from the Endless Summer collection PA-1108. Also Momenta is the "Welcome to Paradise" sticker and the stripey tag from ST-4952 the vacation multi pack of stickers.
Then I added twine from the Twinery, random stickers and die cuts, a ship's wheel from the bead section, some ric rak (I love that stuff) and distress inks in Evergreen, Peeled Paint and Spiced Marmalade. The embossing folders are both Tim Holtz (in case y'all didn't already know!) Oh and also an eyelet from a random bag of eyelets I found in my scrap room, and the big orange eyelet type thing from We R MK.
So I used: 2 tags, twine, patterned papers, metals and embossing.
Hope you enjoy and are inspired to EMBOSS!
SYAO10

doily
twine
stick pin(s)
3+ flowers
chip-board
washi tape
3+ patterned papers
bling
TECHNIQUES
punches (border/corner)
acyrlic paint (stamped-brushed-stencil...your choice of application)
distressing
I've actually already used this sketch once, which threw me off a bit... But I recovered at the last minute and got back in the game. I knew I didn't want both pages to look like they were from the same sketch, so I planned to make some modifications, maybe turn it, and then this happened (lol!)
| See it? My itty bitty bit of bling on the metal tag :) |
| I swear this bow looked better IRL... grr |
I know. Its totally the same sketch. But it will be far enough apart in the album that no one will notice (I hope!)
All the papers are Momenta from the Seasons and Occasions pack (PA-1992), the black and white cardstock pack (PA-2390), and a photo mat pack. Stick pins are made by me for the one in the middle, and Maya Road for the green leafies. The metal tag is Making Memories and the chipboard is Cosmo Cricket. The circle tags are Colorbok. I used a Tim Holtz mask and Jenni Bowlin Weathered Wood paint dauber to do the edges and the clock. So how did I do on the challenge? I used twine, stick pins, chipboard, and bling, and used acrytic paint as my technique.
SYAO11

PRODUCTS
2 or more tags
twine
stick pin(s)
3+ flowers
chip-board
washi tape
3+ patterned papers
metal/foil type embellie(s)
TECHNIQUES
punches (border/corner)
acyrlic paint (stamped-brushed-stencil...your choice of application)
distressing
embossing (dry or heat)
What a crazy sketch! I mean, really... what was I gonna do with that! Surprisingly it turned out FABULOUS...
| I love using hand writing!! |
| Love my new embossing folders matched with Distress ink.. how cool do those two pieces look? |
My supplies? Well... this is a Momenta layout for sure: the solids in green and orange that were embossed are from PA-1033 the vibrant cardstock pack. The two blue strips plus the yellowy orangey background page are from the Travel pyramid pack PA-2389, and finally the circly paper is from the Endless Summer collection PA-1108. Also Momenta is the "Welcome to Paradise" sticker and the stripey tag from ST-4952 the vacation multi pack of stickers.
Then I added twine from the Twinery, random stickers and die cuts, a ship's wheel from the bead section, some ric rak (I love that stuff) and distress inks in Evergreen, Peeled Paint and Spiced Marmalade. The embossing folders are both Tim Holtz (in case y'all didn't already know!) Oh and also an eyelet from a random bag of eyelets I found in my scrap room, and the big orange eyelet type thing from We R MK.
So I used: 2 tags, twine, patterned papers, metals and embossing.
Hope you enjoy and are inspired to EMBOSS!
Wednesday, April 18, 2012
Momenta and 2SF March Sketches by Joann and Sharlene
This is Sharlene's sketch. Its a card sketch but I used it for a layout instead.
This is what I came up with:
This is Joanne's sketch:
And here is what I created:
This is what I came up with:
The circle is from Bo Bunny, frogs from Sticko and pretty much the rest of the paper and the alphas are Momenta. The patterned papers are Chloe's Garden from PA-2384, and the alphas are from ST-3194.
This is Joanne's sketch:
And here is what I created:
This one is a big mish-mash including Momenta, Recollections, Bazzill. The bling and puffy stickers are all Momenta from three different packages: ST-3087, ST-3052, ST-3503.
Monday, April 16, 2012
Zobbie Zombie is back!
I love the Zobbie Zombie image from Scrapbook Stamp Society. I find myself coloring him over and over, and so I decided to use him to make a birthday card for my 17 year old brother in law to whom zombies are, of course, cool...
This time I skipped the bling and Stickles to keep him a little more masculine :)
I used:
DCWV card base
Momenta paper (from my ancient pack yet again!)
Both the base and the paper were misted with Tattered Angels leather glimmermist (OK so I added a bit of girly)
some black corrugate
Sentiment is printed out
Spiced Marmalade distress ink
I am entering this card in the following challenges:
One Stitch at a Time Challenge #109 - brights - I think this card is rather bright!
Pan Pastel Challenge #14 - one for the boys
Paper Sundaes Challenge #116 - Anything goes
Stampalot April Challenge - Happy Birthday
Ink on my Fingers - Men themed (he's 17 so he counts now eh?)
Thursday, April 5, 2012
Scrapbook Stamp Society Butterfly Kisses Blog Hop
Welcome to Scrapbook Stamp Society's Butterfly Kisses Hop.
Today we have all kinds of fun, we would love for you to hop from blog to blog and leave a little love by the end of the week.
We do have candy for all today! Visit our store www.scrapbookstampsociety.com and look through our digital download FANTASY section to get your FREE candy. There are 5 pages and you'll have to guess which digital stamp has the golden egg. When you see the golden egg there will a download link for you.
Also remember if you link up a project using an SSS digi you bought this month, you can win a Sizzix Texture Boutique!! How exciting! I want one! Just go here and link it up!
My project this week uses three digis by Mitzi Sato-Wiuff - Ballerina Kitty 1, 2, and 3. I made a wood wall hanging for a little girls room.
I used MDF letters from Michael's, Momenta Chloe's Garden paper from the Pyramid pack (used the smaller pieces with the smaller patterns), twine. The flowers and butterflies are made out of scrap cardstock and cut using my Silhouette. Everything got a nice coating of Perfect Pearls mist to give it a bit of glam, along with the bling and the pearl as the flower centres.
Here are some close-ups of the colored images. For all three kittens I used the following Copic markers: E31, E35, E37, BV00, BV02, BV04, BV08, R32, R35, R39, Y11, Y13, Y15, Y17, E000, BG10, BG15, G05.
Thanks for stopping by in the hop, and let me know if you have any comments or questions. If you didn't start at the Scrapbook Stamp Society blog, go back to the start and visit all the talented ladies. If you did, your next stop is Joan.
Here is the hop listing:
Start- http://addicted-to-stamps.blogspot.com
1. Linda - http://lindasimpsoncraftypieceofheaven.blogspot.com
2. Nataliya- http://lovecraftsforever.blogspot.ca
3. Gill - http://creationsbygillm.blogspot.com
4. Karin - http://karinsartscrap.blogspot.com
5. Chrissy - http://chrissyscardland.blogspot.com
6. Jessica - http://kawaiislandgurl72.blogspot.com
7. Bee- http://beeordee.blogspot.com
8. Claire- http://clairescraftycreations.blogspot.com
9. Pamela- http://pamelascraftspot.blogspot.com
10. Tory - http://tfraildesigns.blogspot.com
11. Joan - http://Joan-discoveries.blogspot.com
12. Lisa T - http://lilfeathers.blogspot.com
Wednesday, April 4, 2012
SYAO8 & SYAO9
Yep... behind again as usual. I always get these in the gallery and Paper Secrets forum on time, but I don't always get them up here, and with things like hops going on... well, I'm sure you know.
BTW - can someone tell me how to make my hop posts stay on top??
SYAO8
doily
twine
stick pin(s)
3+ flowers
rub ons
washi tape
3+ patterned papers
bling
TECHNIQUES
punches (border/corner)
fussy cutting
distressing
Pretty eh? I was sad I had used up all my 5x7 photos so I decided to make it into two photos instead. Love this sketch... file that one for use later!
I had to look high and low for just two photos I wanted to use, and finally this is what I came up with.
I used stick pins, flowers, and washi tape.
Here's a close-up of my clusters, I think its the best cluster I've ever made! I love the Precocious Paper flowers soooo much!
SYAO9
doily
twine
stick pin(s)
3+ flowers
rub ons
washi tape
3+ patterned papers
bling
TECHNIQUES
punches (border/corner)
fussy cutting
distressing
Hated this sketch. Had no idea what to do with it. I always get thrown when there are weird shapes as the focal points lol! Luckily I had some shaped paper like that shape (does it have a name? I wouldn't even know how to make my Silhouette cut that thing). I really need to buy more shaped paper. It makes my brain work harder :)
BTW - can someone tell me how to make my hop posts stay on top??
SYAO8
doily
twine
stick pin(s)
3+ flowers
rub ons
washi tape
3+ patterned papers
bling
TECHNIQUES
punches (border/corner)
fussy cutting
distressing
Pretty eh? I was sad I had used up all my 5x7 photos so I decided to make it into two photos instead. Love this sketch... file that one for use later!
I had to look high and low for just two photos I wanted to use, and finally this is what I came up with.
I used stick pins, flowers, and washi tape.
The black striped cardstock is Momenta from PA-2390, while all the pattered papers are Momenta from the Season's and Occaisions stack PA-1992. The washi tape is Tim Holtz, and the flowers are: Precocious Paper for the rolled rose and the big flower and leaves, Recollections for the medium orange flower other than the black centre, and who knows with the rest. Maya Road stick pins and some Momenta bling from ST-3087 round out the party. The congrats chipboard is from Studio G.
Here's a close-up of my clusters, I think its the best cluster I've ever made! I love the Precocious Paper flowers soooo much!
I ruffled my washi tape by hand and then stitched down the centre(ish) to make it sit flat and pretty :)
SYAO9
doily
twine
stick pin(s)
3+ flowers
rub ons
washi tape
3+ patterned papers
bling
TECHNIQUES
punches (border/corner)
fussy cutting
distressing
Hated this sketch. Had no idea what to do with it. I always get thrown when there are weird shapes as the focal points lol! Luckily I had some shaped paper like that shape (does it have a name? I wouldn't even know how to make my Silhouette cut that thing). I really need to buy more shaped paper. It makes my brain work harder :)
This photo is of 3 of my 6 nephews and my hubby's 3 little brothers at our wedding. Its too bad the other 3 nephews weren't up there, because its such a cute photo and its not even posed! The photographer just saw them like that and snapped the photo. They are on the 3rd level of the reception room, looking down on the dance floor etc. It was such a cool venue!!
Paper is Bo Bunny Cambridge for the shape and the green patterened, MME Lost & Found for the background PP, and DCWV Photo Stack 2 for the strip. Also Authentique for the photo mat. Alphas are Creative Memories Rugged, and the fighting lion rub on and the fancy bling-y brad are Bo Bunny Cambridge too :)
This is my ugly twine and button flower I made. Feel free to scraplift or agree with me that its ugly. Ugh. Epic fail lol.
So to fulfill the challenge, I:
distressed
used:
twine
rub-ons
3 patterned papers
and bling? Maybe? I am not sure if that iCandy brad counts as bling or not :)
Tuesday, April 3, 2012
CYAO7 & CYAO8
Getting behind again with all these renos, so here is a look at the CYAO projects from Paper Secrets over the last two weeks.
CYAO7

Use 3 of the following products/techniques:
buttons
ribbon
rub ons
sewing
an organic element (which can be anything found in nature, stamped leaves, flowers, trees, an actual branch) just tell us what you used and how you used it.)
paint
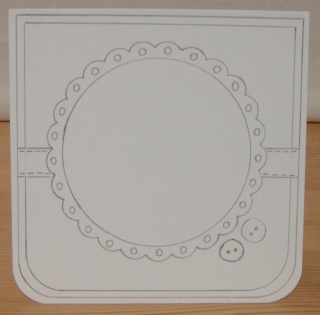
Cute sketch eh? I decided I wanted to change up the shapes and use my new star punch because I wanted this one to be a congrats card.
The star punch is Creative memories, the striped paper is my ancient Momenta, the cardstock scrap and the card DCWV. I used glitter floss from We R MK, regular embroidery floss, and some thick twine that I think is Twinery. Buttons too are stash.
So what did I used - buttons, ribbon (the Congratulations, which is inked with Spun Sugar) and sewing :)
CYAO8

Use 3 of the following products/techniques:
felt
punched border
glitter
a sticker
a critter (can be any critter you like, bugs, frogs, birds, cows ect. ect. )
no black ink
So as an FYI, I interpreted this "no black ink" as "use ink other than black" as I could have easily not stamped anything on this one with its gorgeous design and just said no ink. I decided to make a 50th birthday card since my aunt's birthday is in a few weeks and I am going to a joint Easter-birthday party for her :)
I used glitter, a sticker, and no black ink. The numbers and "doily" were cut using my Silhouette. All the paper are Momenta from the vibrant cardstock PA-1033 and the Let's Party collection PA-2370. The trim is Webster's pages and the glitter is all from Stickles (stardust I think and spiced marmalade).
Happy 50th Tante!!
I am also entering this 50th birthday card in the 2 Sisters challenge: birthday fun.
Monday, April 2, 2012
Paper Secrets Birthday Bash
Paper Secrets celebrated its 3rd birthday over the weekend with a few challenges. I decided to enter a few of them.
The first was the birthday layout challenge. The photos had to have something to do with a birthday and:
It's paper secrets 3rd Birthday so to celebrate we will create in 3's.
For this challenge you are to use ONLY 3 of each item listed and your layout must be birthday related. You must use at least 5 of the 10 items below.
You can also use other items in addition to the 5 as long as you use them in 3's. 3 flowers, 3 brads, 3 papers, etc.
3 Patterned Patterned
3 Brads
3 Flowers
3 Ribbon/Trim
3 Stick Pins
3 Stamped images
3 punched items(border,shapes,corner)
3 photo corners or anchors
3 tags
3 chipboard
Wowie. What a challenge, eh?
This is what I came up with:
I used:
3 patterned papers, all Momenta from the Let's Party premium paper pack PA-2370
3 chipboards - sweet and two chippie buttons
3 flowers (Recollections)
3 mini tags
3 bigger sized brads
I might end up DQ'd because I did use 4 different cardstocks, but the two blue ones are just one is textured and one is not, so I think I can fight my case :)
I also journalled in 3 spots - around both circles and below the photo.
The title and subtitle were cut using my Silhouette. The top font is called Kingthings Inkdinky available for free through lots of websites, or just visit Kevin King himself :)
I will finish off this post tonight-ish... just wanted to send the top bit to Kevin King while I was thinking about it :)
The second one I tried was a tic-tac-toe challenge. I have always wanted to try one of these but never get around to it!

I did the centre vertical - masking (with my new TH masks I just got in the mail! yay! love! Already used them twice!), diecuts (electronic, everything cut on this page went through the Silhouette) and brads - located randomly in the centres of gears, on photos, etc. I think I need to buy brads in bulk - I have almost used up the two metal colored packages I got for Xmas. Have only used a few of the other pack I got (stars) but that's because they are shaped so I can't use them every single second of the day :)
I am also entering this one in the Another Freaking Scrappy Challenge 1st April Challenge to show a trick or a prank... this is certainly a prank that was pulled on me, but I loved it!!!
Monday, March 26, 2012
2SF Christa's Monday Challenge, including Momenta
Not sure if I've mentioned this before, but sometimes, Christa is evil lol. She said for this challenge over at Two Scrapbook Friends that we had to use shapes other than squares, hearts, stars and circles.... which of course are everyone's go-tos.... but truly, they weren't mine. I just got a few shiny new punches so at first glance I thought, GREAT! I can use my fab new punches... which are stars and hearts! Darn.
Then I thought about this layout I started EONS ago and never finished. I made the RHS page photo collage a long time ago when I first got my Creative Memories blooming star template (its a flower. not a star lol) and then had no mojo left to finish the pages.
The patterned papers are more of my ancient Momenta stack that I love so much but can't even tell you what its called its so ripped up and beaten! (I bought it damaged and missing the "Summer" section :( ) The orangey cardstock is from DCWV, and then the blings and letters are stash items. I am thinking about going back in and adding some stickers to the second page now that I look at it closely, but I'm not sure.... any suggestions?
Sunday, March 25, 2012
TUTORIAL: Customizing Momenta Cardstock and a Scrapbook Stamp Society Image
This week, I got this new release, Super Hero Zell & her Walker by Sherri Baldy from Scrapbook Stamp Society to play with.
I wanted to use my textured black Momenta cardstock but I wanted some way to bring out the texture more, and of course you can't just ink up the black cardstock straight.
I thought I would share with you how I did this.
What you need:
Cardstock cut to size (I used Momenta - any textured Momenta will work)
Sanding block of some sort
Ink
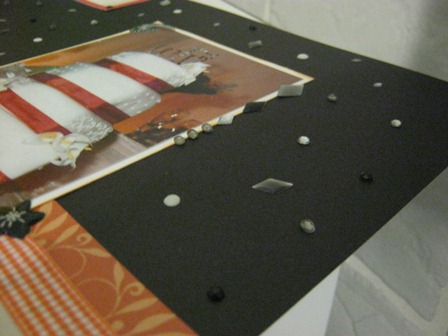
Sand the paper. I used a wood block and a piece of sand paper, but you could a drywall sanding sponge or a commercially available paper sanding tool. I find with a linear pattern like this, you can highlight the pattern best by sanding along the lines. Sand more heavily on the edges to really highlight the texture and the edges
Wipe/blow off as much of the sandings as you can from the paper. You don't want these to accumulate on your ink pad.
Rub down the surface and edges with the ink pad. I used Peeled Paint distress ink.
I also made my own multicolor twine, or at least thats what it looks like. I used two pieces of embroidery floss, and twisted them together between my fingers as I wrapped, using Scotch tape on the back to anchor it. Excuse the inky fingers... I am a pro at getting dirty :)
I colored the image with my Copic markers, and added the squiggles and the spider webs free hand with Stickles.
Here is a 12x12 page of raised stripes from the same Momenta pack I also sanded down.
I wanted to use my textured black Momenta cardstock but I wanted some way to bring out the texture more, and of course you can't just ink up the black cardstock straight.
I thought I would share with you how I did this.
What you need:
Cardstock cut to size (I used Momenta - any textured Momenta will work)
Sanding block of some sort
Ink
![]() |
| Here is my pre-cut cardstock card out of Momenta PA-2390 |
![]() |
| A piece of 2x4 and some scrap sand paper is all I use! |
Sand the paper. I used a wood block and a piece of sand paper, but you could a drywall sanding sponge or a commercially available paper sanding tool. I find with a linear pattern like this, you can highlight the pattern best by sanding along the lines. Sand more heavily on the edges to really highlight the texture and the edges
Wipe/blow off as much of the sandings as you can from the paper. You don't want these to accumulate on your ink pad.
Rub down the surface and edges with the ink pad. I used Peeled Paint distress ink.
I also made my own multicolor twine, or at least thats what it looks like. I used two pieces of embroidery floss, and twisted them together between my fingers as I wrapped, using Scotch tape on the back to anchor it. Excuse the inky fingers... I am a pro at getting dirty :)
I colored the image with my Copic markers, and added the squiggles and the spider webs free hand with Stickles.
Here is a 12x12 page of raised stripes from the same Momenta pack I also sanded down.
Subscribe to:
Posts (Atom)