Welcome to my blog!

The purpose of this blog is to explore my development of scrapbooking techniques. I will also provide reviews of products when I find something great or something terrible, and will show off all the work I enter in challenges and contests. Please check out my Welcome note if this is your first visit.

Feel free to ask questions about any of the materials or techniques shown here!

Please leave a comment and let me know what you think, or follow my blog so you can keep updated!

Happy Scrapping!


Showing posts with label Creative Memories. Show all posts

Monday, May 7, 2012

Big Picture, 2SF, Frosted Designs and Paper Secrets all wrapped up in one

Another combo project - I really like doing these to combine different things. This one uses a sketch from Two Scrapbook Friends (by Shelby)


a twine technique from the Big Picture Classes NSD event (twine button centres),

a Frosted Designs NSD BINGO card challenge [circles, buttons, stitching, flowers],


and the Paper Secrets  NSD requirement to use Authentique.


And here it is.


So my circles, if you're looking for them, are also my twine button centres. I love this technique. I am half considering going home and covering all my buttons with twine centres. But that would be crazy!!

I used that flower-like corner punch from Creative Memories for the first time on this LO and I love it. Expect to see more of that too (I can't believe I've had it for a few months and not tried it til now!)


Wednesday, May 2, 2012

Momenta & SYAO13

I'm still working on the Scrap Your Ass Off Challenge at Paper Secrets. Its a last-woman standing competition, and I am still hanging in on week 13. Yet to figure out how I am going to stay in it while on vacation, but I'll figure it out :)

This weeks challenge:


PRODUCTS (pick 4)
fabric or felt
ribbon
photo corners/anchors
3+ flowers
chip-board
3+ patterned papers
transparency
metal embellishment/hardware


TECHNIQUES (pick 1)
punches (border/corner)
acrylic paint (stamped-brushed-stencil...your choice of application)
distressing
embossing (dry or heat)


I liked this sketch right away.... it uses more than one photo! I gotta be honest, I may die in this SYAO challenge not because I can't get the page done, but because most of them are one-photo sketches and I have about exhausted all my single photo page layouts I have for all the albums I'm working on... guess I'm going to have to start getting creative :)

What I came up with this week:


See how I snuck in that extra photo as the title? I love taking photos of the signs of places we visit. I always try to take a photo of the sign first It serves many functions:
  1. Make sure you actually remember where those photos were taken
  2. Breaks up the photos in your files easily and simply
  3. Gives you the right spelling
  4. Gives you the option of using a sign for a title! I do this quite a lot, but not always.
I also try to take photos of wordy signs when I want to remember all about something, and then I can use those as journalling. Likewise, keeping all the pamphlets is helpful in case you want to add something special to your page! I have something top secret planned for all my Hawaii pamphlets that I hope to reveal soon!!

How did I do on the challenge? Well, I used: fabric for the two flowers, ribbon, 3 flowers, a transparency (on the middle photo), 3 patterned papers and chipboard buttons. My technique was heat embossing, which I did using a Momenta stencil GS-165 to make the hibiscus flower. I also used Festive Berries and Wild Honey distress ink, and clear embossing powder.

Other supplies:
Momenta Endless Summer Paper Pack PA-1108
Momenta Vacation Pyramid Pack PA-2389
Creative Memories transparent sticker and journalling card
Precocious Paper flowers and ribbon

Saturday, January 14, 2012

Paper Bakery January Sketch - 5 Generations

Paper Bakery has fun scrapping kits, and also has challenges on their blog. They started out January with this cute sketch.


I hesitated on this one as I wasn't sure what to do with it (its all the butterflies lol, they always throw me off). This morning I had the inspiration to use a photo of 5 generations of my family taken the year my sister was born... and this layout emerged...


Sorry about the not-so-great photo of this one, I had to go out and get the photo I had enlarged as the proportions were wrong and didn't get home til it was WAY dark.

The papers are all Fancy Pants from two different collections. The large flower is a floral stem I painted with a bit of gold glimmer glam, and the two red flowers are ribbon flowers from the stash that I painted with glimmer glaze to make the colors work. The "generations" is from Creative Memories and the "5" is Thickers.


Above are my closeups.

I truly feel blessed to have known my great-great grandmother. She lived to be 104 or 105. She is the seated woman. The woman on the left is my great-grandmother. She is still alive and well at 90-something. Next to her is my grandmother. She just turned 70, and other than the grey hair, doesn't look much different. Then myself and my new baby sister in front. This was taken in 1991.

If my great-grandmother is still alive when I have my first child, then there will be 5 generations in my direct family line again. The first 5th generation grandchild to my great-grandmother is about 7 or 8 I think.

Hope you enjoy this little piece of my family history!


Saturday, December 17, 2011

HMITM #186 - Be a Star

OK... this week at HMITM they have really gone crazy lol. The consulted a calendar of strange "holidays", and compiled this list...

December is Bingo's Birthday Month.
It's also Rising Star Month.
And it's National Tie Month.
The first week of December is Cookie Cutter Week.
December 5 is Bathtub Party Day!
 
And then came up with this challenge:
So...I challenge you to use:
* A bingo card (if you don't have these in your stash, just google "bingo card" under Google Images, and you'll find a gazillion).
* Use something that you can tie--ribbons, twine, raffia, etc.
* Use at least 5 stars.
* Use punches or cutters or a shape templates.
* Use your imagination and whatever product you want to create "bubbles" on your page.
 

Crazy I tell you. 

I was stumped... I had no bingo cards, I don't use stars ever... The other 3 criteria were good though. 

So this is what I came up with: 

The photo here is not bad - the photos in the layout are bad but that's all I had to go with from our Weekend to End Women's Cancer 32 km walk.

Back to the criteria...

  • BINGO card - yes. Found a cute Maya Road rub-on set, and used the "Live" card on white cardstock to make it stand out. I really like this set as there are a bunch of little ones - this is the largest (Cuz I'm not so sure I'm into bingo cards)
  • Something you can tie - twine, tied around the rectangle photo (I had to tie it... they said you had to be able to so I did lol)
  • At least 5 stars - I used a star template I have to draw 5 stars beside each other for the border at the top of the rectangle photo. Then I added foam glittery stars to the middle of three of those stars (so that's 8 stars). Then I put the word "star" in stars for a grand total of 12, 13 if you count the word "star" as a star
  • Punches, cutters or shape templates - I used my Creative Memories ovals set to cut the angled photo and its mat
  • Bubbles - originally I planned to stamp using bubble wrap, but the wrap I had didn't have a side of exposed bubbles, so that didn't work. So instead I used my dabber and pink and white chalk ink to dot "bubbles" all over the left of the page... it really helped to add the details
Well... I hope you enjoyed... and join in next week for more craziness!!!


Thursday, December 8, 2011

CR84FN44 - Visiting Maman & Papa

So, the colors over at the CR84FN blog this week.... not so me.


So I flipped through my papers looking for inspiration, and found this gorgeous blue sky and cherry blossoms paper from DCWV. Decided I definitely wanted to use that paper (the point is to use up your stash), so then I went in search of photos to match.

What I found were these cute photos of me when I was little, posing for Mom with all the flowers at my grandparents home.

And so... a layout was born:


Now something weird happened when I took the photo - my coral (perfectly coral) paper magically turned more orange-y.... and I could not figure out how to fix it, although Picasa did a great job with their pure neutral match function. Could just be an issue with this monitor I use, who knows!

So I stitched on my cherry blossom paper using a tight zig zag on my machine, matted the photos in coral, and added some ancient Creative Memories light pink alphas. First time I used those alphas and I am addicted!! So cute and so easy to line up nicely with a ruler (too bad I didn't think of the ruler til half way through Visiting). I also added two glittered dots to the title. These are just glue dots dusted with Martha Stewart glitter. I am loving that idea, it is scraplifted off a Card/Stamp hop I did last week...

Other fun new product I tried on this was the Elmer's Adhesive Tape Runner. I really like it, better than the dot runner as it sticks even better.

Hope you enjoy!

Wednesday, November 30, 2011

Scrap the Girls November - Classic Girly

Scrap the Girls is a fun, no-boys-allowed blog all about scrapping girls. I tried their November challenge this month.

The criteria were:
PINK AS THE DOMINANT COLOUR

MULTIPLE PICS

POLKA DOTS


and as always... NO BOYS!!

This is my take:

I used an ancient pink polkadot baby paper I had, a big fluffy flower, a Creative Memories journalling card, and two Deja Views photo mats from a wedding set. I also knotted the friendship bracelet mounted under the flower. Finally I added extra polka dots with some Jillibean Soup letters!

Photos are baby me at about 6 months of age. I asked my mom for a title and journalling on it - she said she was just playing with her camera photographing her favourite subject - MOI - le bebe aux yeux bleus :)  

Hope you enoy!!

Sunday, November 27, 2011

Paper Secrets November Sketch Challenge - In the Rain

Paper Secrets is another great challenge forum you should check out. Below is the November sketch. I love how intricate it is and all the little details.


I decided to rotate this sketch to fit the portait oriented photo I had.


I used my Creative Memories Hummingbird letters to make the title, as well as a Creative Memories corner punch to jazz up the title block.

I used a heart punch to make the background flower petals behind my fabric flower.

Papers are Cosmo Cricket Everafter, and I used the Creative Memories Picket Fence border punch. 

Sketch Along Tuesdays #28 - Kiss the Bride

Trust Frosted Designs to come up with another amazing sketch for their Sketch Along Tuesdays:


This was a complicated sketch with a lot of elements. I chose to use a background paper with a lot of elements and so eliminated some of the other elements from the sketch.


I had a lot of find with this one... didn't even plan it out. The paper is Creative Memories Reminisce collection - I love this collection and you will see it more and more from me. Chipboard is Cosmo Cricket Ever After, flowers Recollections, and the rest is random. The black paper and vellum are Deja Views.

Hope you enjoy this one, please comment and follow my blog :) 

Thursday, November 17, 2011

2SF Online Crop - Shelby's Challenge - Green with Envy

Shelby provided the Green with Envy challenge for the 2SF Burst of Color online crop over at their forum.

Right away I groaned. Green is sooo not my color. I have some specific colors of green that I like, and I have 2 green sweaters, but thats about it for me and green.

So I whined.

Then I forced myself to just get it over with as then I could have fun doing the other colored challenges I liked so much better.


So there was no sun yesterday here, so the photo above is a little screwed up. The colors are actually what you see in the photo below - not sure why that one worked out so much better!

I picked the patterned paper because I wanted a pattern (Shelby used one in her preview) and it was the nicest green paper I had. Then I riffled through my photos looking for something that worked with the green - when I came upon Dylan in this orange shirt.

Add a Creative Memories journalling card, two CM photo mats and TA-DA the base layout was complete.

I was originally going to use my blue letters for the whole title, but I didn't have one of the letters for FACE and had already stuck them on. In retrospect, I love the two types of stickers much better anyways because it adds more emphasis to the key word in the title. The "Face" stickers are Rugged from CM.

The "True Story" sticker is also CM. This was really just a CM layout, other than a few letters and the base patterned paper and the Cricut flowers.


All in all a simple layout, but that is what I was going for with this one to emphasize the story.


Hope you enjoy, please comment, and follow!

Thanks

Use it Tuesday #19 - Cooking Up Fun

So I found a new challenge blog this week that I love so much I applied to their Design Team!

Use it Tuesday is a blog with varied challenge types, and the whole goal is to use up your old stuff in your stash... so right up my alley as I am still banned from Michael's until after Christmas (did get a hall pass to go buy some more adhesive as I ran out last night).

So finding it yesterday and the challenge is due tomorrow, I was in a bit of a rush.

Here is Challenge #19:
COOKING!

One of my favourite topics, and a refreshing break from the two color palette challenges I did last night too! Plus, Two Scrapbook Friends is having a Burst of Color online crop right now, so I've got color challenges coming out the.... hoo hah? I have no idea how to spell that word!

Anyways... back to the challenge:

I decided since I had to use old stuff I would actually finish a layout I prepped about 2 years ago and that has been sitting in my album waiting for me to put it together. All I had made was the base for the door and the papers amassed. This is what it came out to be:


My friend Laura made my wedding cake for me. It was sooo yummy - we used a Martha Stewart lemon recipe, and was slightly oversized (I have 2 pieces still in my freezer), but it was gorgeous.


I made a little door to hide the final product. Originally this door was supposed to open vertically back 2 years ago, but I changed which photos I wanted to use and changed the door. 

Here is a closeup of the title on the door and the stamping.

Here is the closure on the door, the twine actually hooks to hold it shut.


So what did I use out of my stash:
  1. old unused papers that were sitting in my album for 2 years (who knows when I bought them to begin with, I think another 1-2 years earlier)
  2. photos I printed 2 years ago
  3. a paper and cardstock door I made two years ago
  4. All three stamps (bell, cake and arrows) which I bought before the wedding (June 2009) and have not used those specific stamps off the cards yet
  5. The letters for CAKE - this is some old pack of stickers I don't know when I bought it, but it was a long time ago because there is lots missing out of the pack and I'm at the point where I wish I had bought two  (TIP: always buy two packs of alphas. You'll need them. Guaranteed)
What was new:
  1. The twine! I just got my twine in last month and I am using it up quick!
  2. The "Making the" letters - also bought them last month although I bought them from my Creative Memories Consultant's stash of stuff.... so sort of old
And the brad I used I will classify as neither old nor new. I've had them for about a year so I don't think they fall in either class.

Back to always buy two sets of alphas... look at the "e" in "the". Can you tell its a "c" I made into an "e" with a marker? That's why you need two sets. Because sometimes you need extra letters. And to be honest, its not always the obvious ones. I.e. L. My friend Kelly used both my Ls. So the layout I did that day using the same chipboard letters was missing an L til I picked up another pack. Haven't used an L since and I have done at least 3-4 more layouts with those alphas lol

Another TIP - when you buy alphas, look at if you get extra vowels, "s", "t", "r". At the very very least you want an extra of each of those letters otherwise you're stuck with a page of W and X at the end. (at least you can make a W into a M)

And a final TIP - look for punctuation and other add-ons to your alpha set. Jillibean Soup has great alphas that include some shapes, punctuation etc. I also really love my Nancy O'Dell Hummingbird letters from Creative Memories as they came with little doodled flowers to match those on some of the capital letters.... I just wish they came with more as I have capitals left over and no more flowers :(


Well... that was a bit of a long one! Thanks for reading and please comment and follow.

Also, I have now labelled all my posts so you can find similar ones. Use the TIPS label to find all my tips to you my wonderful readers!

Thanks


Monday, November 7, 2011

Sketchy Thursdays 11.3

Sketchy Thursdays brings us another great sketch this week... so get on over there and check it out and join us!


I really liked this sketch and the fun feel of it. I don't have many photos that can be cut down to a small size, so I specifically printed the small photo for this LO. I really thought this was a good sketch to focus on something special - a special moment, a special gift, a special friend, a special tradition.

I finished a layout of the girls getting me ready for the wedding for a Sketch Inspiration challenge you can see here, but purposely left off placing the veil.

My sister called me maybe the Thursday night or even the Friday night before my wedding (either way it was very late) all in a fuss. She is very superstitious - I'm not... I own a black cat lol... and she found this very important superstition - a bride's veil must be placed by a happily married woman...
Not to get into my family dynamic, but my mom was never married and "happily married" actually caused us both to panic a bit... who did we know? No one... what were we going to do?

So we are thinking and thinking and finally we come up with the answer... our cousin's wife, Etta, who, with her family has come all the way from the Orkney Islands for my wedding! Perfect!

In retrospect, the mother of my child attendants would also have been a good choice, but like I said, we were panicked!


I love the intimacy in the larger photo and just the feel overall.

A challenge that has been annoying me over at the Two Scrapbook Friends forum was to use a paper tole technique on a page.I managed to do it here and love the little pop it gave to that orange flower (and I used up a little scrap of paper so bonus points!)
I journalled in silver on a tag and on a Creative Memories flower punch. I also used pearls (left over from my Moxie Fab LO)  to anchor the two tags I used. I didn't have large enough brads (add that to the xmas list!).. but in retrospect I love the pearls on there (good thing I have a whole necklace's worth left!)

Hope you all enjoy and leave some comments... and there's still time for you to get in on the Sketchy fun!

Sunday, November 6, 2011

Moxie Fab World Tuesday Trigger: Beads & Baubles

Well, let me tell you, when I saw the Tuesday Trigger over at Moxie Fab World this week, I was instantly inspired... it was just so... Krissy.
Krissy is my younger sister and I chose to use this inspiration photo to make a layout of photos of her from my wedding...


I feel like this layout has all the same descriptor words I would use for my sister: a la mode, fashionable, trendy, fun, funky, bright, happy, unique... etc.  I really wanted to take both the mixed-media feel and the colors from the jewelry trigger to incorporate in the layout. I chose the green/teal and white background to mimic the photo, and tried to add as much gold, pearl, bling as possible to really get the feel of the bracelet, and I think I did it!

Now for more on the details:
Paper is Cosmo Cricket. Everything else is random-ness pulled out of the stash. I used paper flowers, ribbon flowers, buttons, charms, clear stickers, Jolee's glitter stickers, bling, glass pearls, and other random stickers to keep the mixed media feel going. The metal chain is real chain I picked up in the jewelry department at Wal-Mart.


The paper roses were made from a tutorial over at Scrap A Little. You have  to check out this website, she has 20 tutorials on handmade flowers!  I brushed them with some Star Dust Stickles after the glue dried to add to the sparkles on the page.


The large ribbon rose is made using a Gluber from Cosmo Cricket.... I totally suggest you check them out and google for some tutorials on all the fabulous flowers you can make with ribbon and trims found at your local fabric store. The other small ribbon roses I received in a 1 lb bag of buttons, which is where all the gold and pearl buttons came from too!

This page ended up really thick, so I will have to use foam strips to space out the binding on my book to keep other pages from getting crushed. If you can't find a tutorial on this, there is one over in the forum at Two Scrapbook Friends.

Finally, the title and all the little clear stickers are Creative Memories Nancy O'Dell Hummingbird collection. I really love this collection as it is so elegant and fun to use. I didn't like how huge the Y was, and didn't want to use a basic serif y that was avalable, so I tucked the bottom of the y down under the page. I decided only to use her name as the title and to forgo journalling as the page was already so busy.

So I hope you enjoyed and have a good feeling for my sister and her personality now :)

Friday, November 4, 2011

Paper Variety Smile Challenge

UPDATE: Thanks to Paper Variety for selecting me as one of the Sunday Spotlight layouts!


Paper Variety had a fun challenge this week - make something funny or humorous - any type of project you wanted...

Well I've been wanting to scrap this particular set of photos for a while, they line up perfectly like a comic strip and although you may not find it funny.... I sure do and anyone who was still sober enough at my wedding to remember this part of the night probably can't help but smile as well!

But before we get to the LO, here's some background info.

My father emigrated to Canada over 40 years ago from the Orkney Islands, a part of the UK, considered part of Scotland... but they are NOT Scottish lol. You can see it at the top of this map of the UK below, borrowed from latereviews.blogspot.com.

It is considered one of the most historically rich islands in the world, with archeological sites from all different periods, "standing stone" rings and many other wonderful historical sites. I definitely recommend a visit, and be sure to see Skara Brae, Maes Howe, the Brough of Birsay and the Ring of Brodgar. Visit Orkney is a fabulous site for tourists.

So one of the traditions (see more info on Orkneyjar) for a wedding is the Bride's Cog. It is meant for luck (and inebriation) and is passed around at the end of the night by the bride, who tries to feed everyone this alcoholic mix. I have no idea what was in it. I saw a LARGE cardboard box with all sorts of alcohols and spices in it (and of course didn't think to look closer to see what I was getting myself into). There is a recipe here, however I don't think that's the one... I remember seeing something more exotic...

So essentially this is my recipe: grab bottles of everything (including some good Scotch) and dump in large pot. Add some spices and probably some sugar. Heat her up til steaming and pour into the traditional bride's cog. You will see mine below, brought from Orkney by my darling cousin John.

So the night unfolds like this:
During the speeches, John gets up and brings wishes from the Orkney Isles, and then begins to explain the bride's cog... (scrapbook page to follow... I need to watch the wedding video and write down his exact words...). At least now everyone is prepared that a vessel of strange liquid will come to them and that they are expected to drink it...

So later on that night I get herded to the bar to pick up my cog (which I have to drink first) and its BLUE!!!  Soooo not what I was expecting... and here is the LO of that very moment!


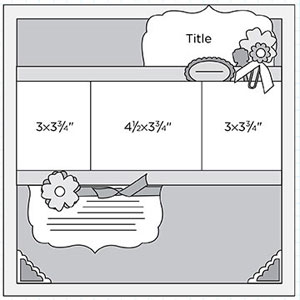
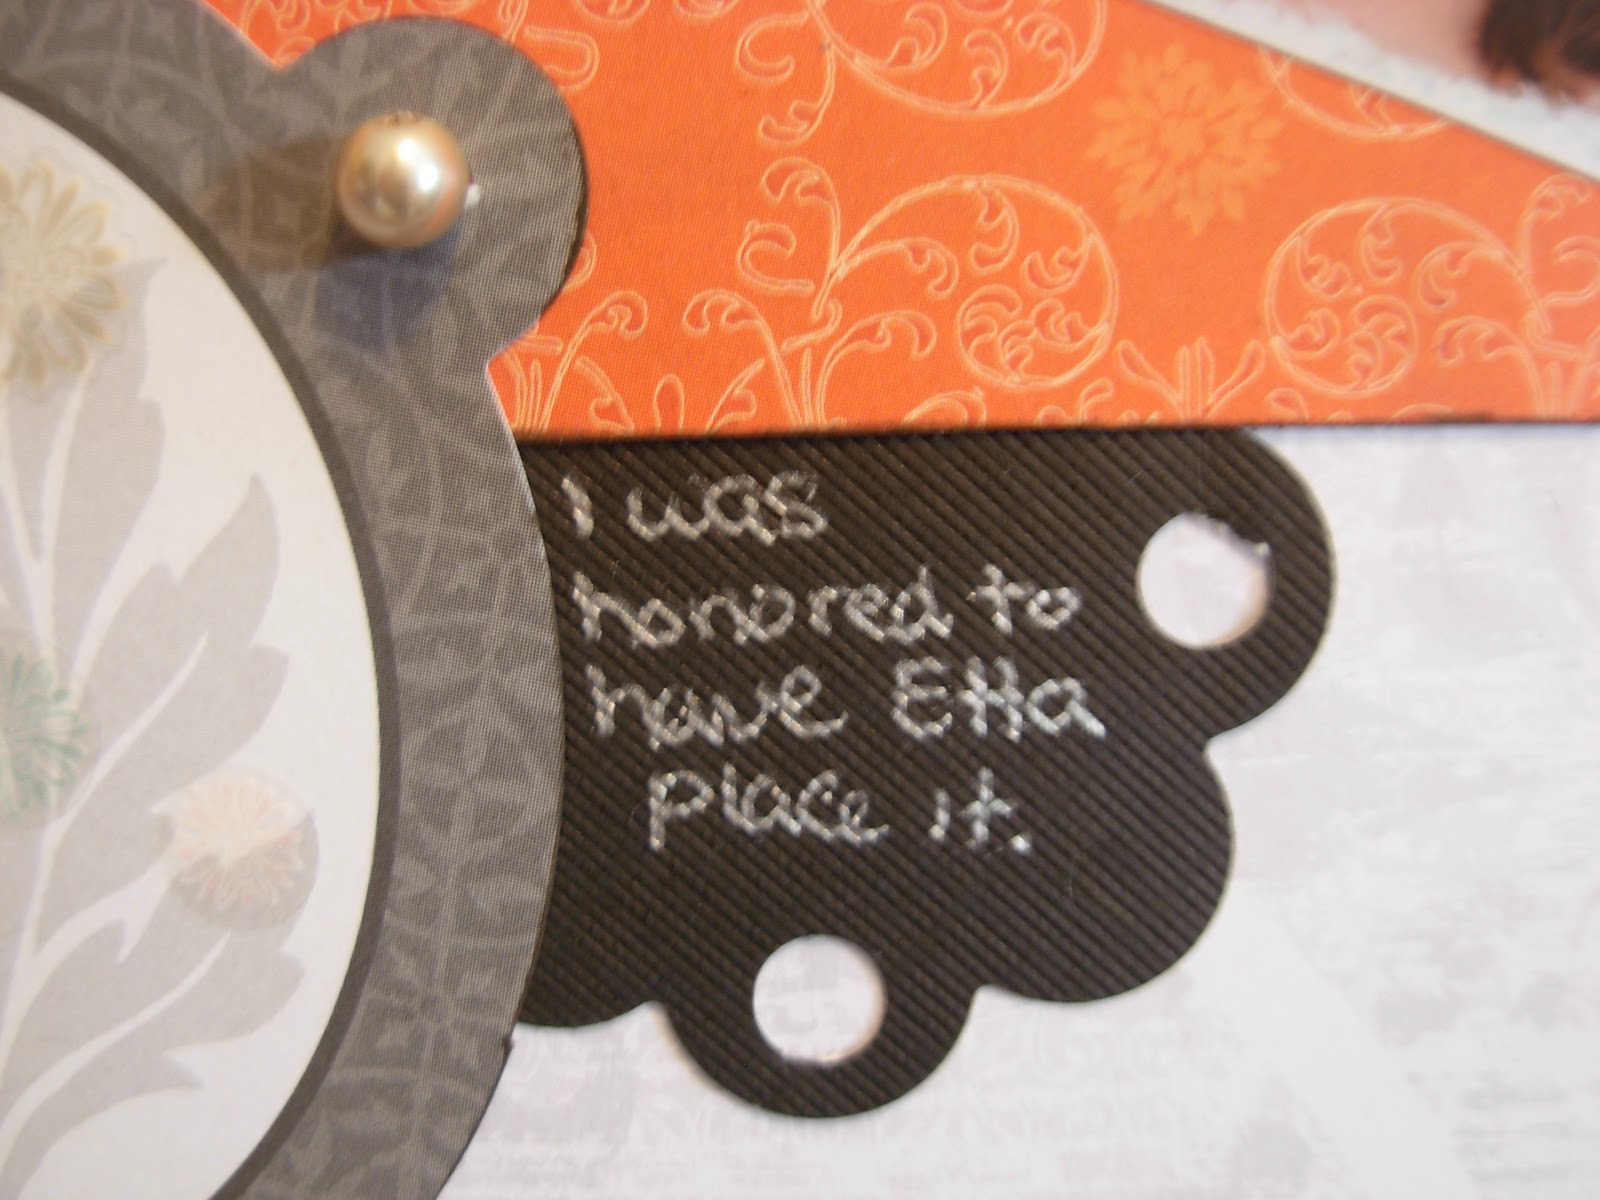
My goal was to make it comical and comic strip like without being a strip. Papers and journalling block are all Creative Memories Reminisce. The speech/thought bubble are hand drawn and colored with my Copics (T10, B00, B05, Y15) and the title is also Copics (same with some Y13 added in as well). There is also some E0000 Copic drawn around the photos and doodled, which the camera could never pick up, but it gives the paper a tiny bit of texture and patterning.

Its a pretty simple layout, but I didn't want anything flashy to take away from the photos.

To follow this in my scrapbook will be at least 4 pages, if not more, on my guests drinking, their reactions and faces. It will be similar to this as I think most of the journalling will be in speech/thought bubbles... not sure yet as I haven't done them yet!

And to answer the question on everyone's mind... it wasn't that bad. I almost liked it hot. When it was warm, it hit my stomach and my stomach was very unhappy with that... but hot it was passable. Not nearly as scary as it looked :)

Hope you enjoy, please share your stories of Bride's cogs if you have them.. .and if not, make some Orcadian friends so you can try it out!


CR84FN Color Challenge #1

This week, I found this fab blog, CR84FN, who hosts color challenges. I love color challenges because they are a great way to expand your horizons. Most of the time, the colors are not ones you would select on your own, so its a great way to get out of the box and get those creative juices flowing.

This is the inspiration image:

I really love how they give you multiple images plus the color swatches of the colors they are into.

When I saw steel blue, I thought immediately of my DCWV "Neutrals" textured cardstock pad - it has a fabulous steel or icy blue, more like the flowers than the swatch. The yellow and gray combo brought me right back to my wedding theme papers - Cosmo Cricket's EverAfter (2009 release), as there are some beautiful yellow and gray patterns included in the package

I also thought "boys" - how stereotypical... but in flipping through the wedding photos I really liked how the colors set off the limo.. and so this page was born:


The limo embellie is Jolee's, blue flowers are Creative Memories, and large flowers are Recollections, chipboard is Momenta (I think).

Enjoy!

Tuesday, November 1, 2011

Moxie Fab World Tuesday Trigger "Autumn Woods"

When I saw this Trigger inspiration photo over at Moxie Fab World, I was immediately inspired.

First, the colors took me back to my beautiful wedding bouquet with its variations on oranges and greens, with a touch of yellow, red and brown. I also loved the squares and the dimensional aspect of it all, and was determined to combine this into a fantastic layout... and here it is!


This was a great challenge because all the paper I used came out of my scrap bin! I am a hoarder when it comes to scraps, I know there are some pieces I will never be able to use but I can't throw them away, so into a big basket they go! Luckily I had lots of coordinating reds, oranges, yellows and a bit of green and brown left over from other projects.

I used my Creative Memories square punch to punch all the squares. I then inked the edges with Distress Ink - Walnut stain. I used 1/8" adhesive foam squares to "pop" out some of the squares, adding to the dimensional feel of the layout.

I finished off with a few photos, including one I fussy-cut.


I had a lot of fun with this one, and still have to add the title. It will be made of letter charms strung on a piece of twine (somewhere in the mail on the way to my house right now) and wrapped around the photo of me with the flowers. 

Saturday, October 29, 2011

Page Maps Sketch Challenge - Oct 20

Page Maps had the following sketch this week:

Here is my take on it:


I really wanted to go with a whimsical, beachy feel for this one... and I really think I got there. This is a mis - mash of products.... the Hawaii themed papers are DCWV Travel stack and the background is DCVW Photo Stack 2. The journal card is a cut up card from Creative Memories Cheery.

Hope you enjoy and leave a comment!!

Wednesday, October 26, 2011

Frosted Designs Fabulous Friday Challenge - Colors - October 21st

The Fabulous Friday over at Frosted Designs this week was to use the colors from the inspiration photo, and only those colors - but you didn't have to use all 4.

Here is the photo:


And here is my take on it


The purple color really didn't work for me, although I did pull out some purple cardstock entirely intending to use all 4. However, purple is really not a color I like or even use, and with the green, orange and red, I thought it was great as it was and decided against adding any purple.

The journal card and photo mats are from the Creative Memories Reminisce collection. This is really a great pack because you get full size (4x6) journal cards and half size (2x3) cards as well, oriented both vertically and horizontally.

I'm looking forward to the next Fabulous Friday challenge to see what they have me doing next...

Monday, October 24, 2011

2SF October Sketch Challenge

The October Two Scrapbook Friends Sketch challenge was based on this sketch from Pebbles.


I absolutely loved the whimsical, girly feel and decided not to change much...


I did go back in and add some StarDust Stickles to the flowers to glam and girly it up a bit more after taking this photo.

Hope you enjoy and please leave a comment!

Sunday, October 23, 2011

Moxie Fab World - Tuesday Trigger - Finesse the Dress

This week's Tuesday Trigger over at Moxie Fab World was to make a project based on inspiration from this dress:

And here is what I came up with:


This is my page about my ring bearer. The pages for his sisters will be exposed later on this week.

The inspiration I had was the colors mainly. The background paper is more teal and less blue IRL and there is a very lightly chalked background similar to the pattern on the dress. I may go back and draw over it with my Copics. There is also some teal in the star stickers. The two grey accents were both punched with the new Creative Memories border punches. I was at a crop, and I don't have a lacy punch and neither did anyone else, but I like the "picket fence" punch as its a little more masculine anyways.

Once I had it on the page it needed some brightening up, so I added the orange accents as that was the wedding color and it would make this page blend in better with those of his two sisters.

I am really happy with how this turned out and how cute my little man is!